Look for me on:

Probiotic Farmer’s Cheese in the Instant Pot
The High-Protein Fermented Cheese I Keep in My Fridge

 Jump to the recipe!
 Jump to the recipe!
 There’s something deeply comforting about making cheese in your own kitchen. Long before grocery stores lined shelves with ultra-processed dairy products, families cultured milk at home and transformed it into nourishing foods that lasted for days. One of my favorite traditional foods to make is probiotic farmer’s cheese.
This creamy, tangy cheese is simple to make, packed with protein, and filled with beneficial bacteria that support your microbiome. It reminds me of cottage cheese — but honestly, I think it’s so much better.
And the best part? You can make it right in your Instant Pot.
How I Learned to Make Farmer’s Cheese
When I lived in Kansas City, Missouri, for about 30 years, I was a chapter leader for the Weston A. Price Foundation. One of my favorite things was helping people connect with local farmers who produced beautiful raw milk with wonderful farming practices. Every Saturday, I would drive out to pick up milk, meet people, and talk about nourishing traditional foods. I absolutely loved it.
One week, my farmer’s wife — who I just adored — showed me the kefir cottage cheese, or farmer’s cheese, that she was making and selling. She explained how simple it was to make, and I went home and tried it myself.
I’ve been making it ever since.
Loaded with probiotics and traditionally made with kefir or yogurt, I completely fell in love with it. It was creamy, tangy, versatile, and so much more satisfying than anything I had ever bought at the store. Honestly, it felt more like a nourishing farmer’s cheese than the cottage cheese most people are used to today.
Fast forward almost 15 years, and I discovered I could make it right in my Instant Pot. It became even easier and more foolproof to make at home, and now it’s one of my favorite high-protein fermented foods to keep in my fridge.
What is Farmer's Cheese?
Farmer’s cheese is a soft, fresh cheese traditionally made by culturing milk and then gently separating the curds from the whey. It has been made for generations in kitchens all over the world because it was an easy way to preserve milk and create a protein-rich food.
 Unlike many modern cottage cheeses, homemade farmer’s cheese can contain live beneficial bacteria when it’s cultured properly. It’s creamy, slightly tangy, and incredibly versatile.
You can:
- eat it plain
- spread it on toast
- add fruit or herbs
- blend it into dips
- use it in lasagna
- top sourdough bread
- or enjoy it as a high-protein snack
I honestly keep a bowl of this in my fridge almost every week.
Farmer’s Cheese vs Cottage Cheese — What’s the Difference?
A lot of people ask me if farmer’s cheese is the same as cottage cheese. They’re similar, but there are some important differences.
Most store-bought cottage cheese is made quickly using acids and commercial processing methods. Some brands add gums, stabilizers, or fillers to improve texture and shelf life. While some cottage cheese products do contain live cultures, many are heated after processing or don’t contain the diversity of beneficial bacteria you can get from homemade cultured dairy.
Homemade probiotic farmer’s cheese is different because:
- it’s slowly cultured
- the proteins are transformed during fermentation
- beneficial bacteria help break down lactose
- the texture is richer and creamier
- and the flavor develops naturally over time
When you strain the curds from the whey, you also concentrate the protein, creating a very satisfying food that can help keep you full longer.
Why I Love Fermented Dairy
Fermented dairy is very different from regular dairy. During fermentation, beneficial bacteria begin transforming the milk into a living food filled with enzymes, organic acids, peptides, and beneficial microbes.
Many people who struggle with regular dairy often tolerate fermented dairy much better because the bacteria help break down components of the milk during the culturing process.
I’ve been making cultured dairy for decades, and I truly believe these traditional foods have helped so many people reconnect with real nourishment.

Why Use the Instant Pot?
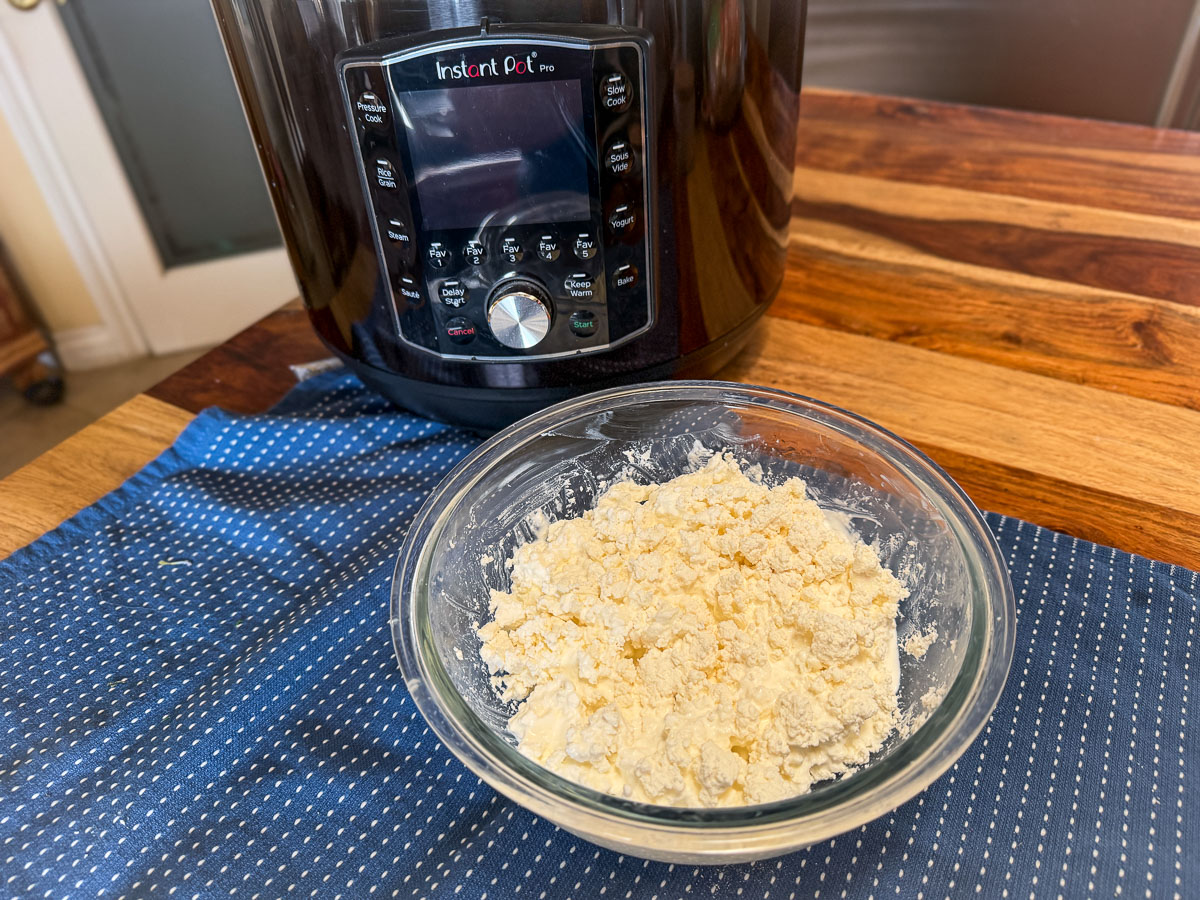
The Instant Pot (that has a yogurt setting) makes this process incredibly easy because it keeps the milk at a stable temperature while the cultures do their work.
You don’t need complicated cheese equipment. You just need:
- milk
- cultures you can use: Kefir, Yogurt Plus, L. reuteri
- an Instant Pot
- and a strainer, cheese cloth, or nut bag
The long, gentle culturing process creates beautiful curds and a delicious, tangy flavor that tastes nothing like store-bought products.

Don’t Throw Away the Whey
One of my favorite parts of making farmer’s cheese is the leftover whey. This golden liquid is full of nutrients and beneficial compounds.
I use whey to:
- add to smoothies
- soak grains
- add to soups
- add to recipes that call for water
- add a little to tea or drinks
Traditional cultures wasted very little, and whey is one of the most valuable byproducts you can keep in your kitchen.

Nutritional benefits
Cottage cheese is packed with proteins, riboflavin, vitamin B12, calcium, and other beneficial compounds. Cottage cheese contains a range of important nutrients and my cottage cheese recipes have billions of probiotics too! 🦠🦠🦠
One serving —1 cup — of 2-percent fat cottage cheese contains
Instant Pot— Probiotic Farmer's Cheese Recipe & Video 🎥
Probiotic Farmer's Cheese in an Instant Pot
Watch The Video
Nutrition
Equipment
Ingredients
- 1 cup Kefir or Yogurt - L. reuteri or Yogurt Plus (do not strain)
- 1 gallon milk - pasteurized not ultra-pasteurized whole milk or 2% or even raw milk will work too
- ¼ teaspoon Celtic Sea Salt - optional
Every ingredient with a link was selected by me to make it easier for you. I may receive a small affiliate commission if you buy something through my links. Thank you! ❤️
Instructions
- Place the kefir and the gallon of milk into the instant pot and set the setting on boil. Bring it to 80°F. Then turn off the Instant Pot and cover it with the lid. Let it sit for 24 hours or until a thick curd forms. You can stick a knife in it to test it. It can take longer than 24 hours if your house is cool.
- After 24 hours or when you see a thick curd has formed, bring the instant pot to the boil setting again and watch it until it reaches 100°F, stirring every few minutes to break up the curds on the bottom of the pan so they won’t burn. You will know it’s done when the whey separates from the curd and you see soft, fluffy curds floating. The Whey is a clear yellowish liquid. If you are not seeing any whey, you can take it to 102-103 F° and hold it for a minute or two until you see a little whey in the mixture and clouds of white.
- Line a strainer with butter muslin (cheese cloth) or a nut bag. Place the strainer over a bowl. Pour the mixture from the pot into the strainer a little at a time. I did this in two batches with the mixture, each time squeezing out the liquid (see next step) and removing the curds. Then I did it again till all the liquid was removed.
- Drain the whey by twisting the bag and the whey will drain through the cheesecloth.
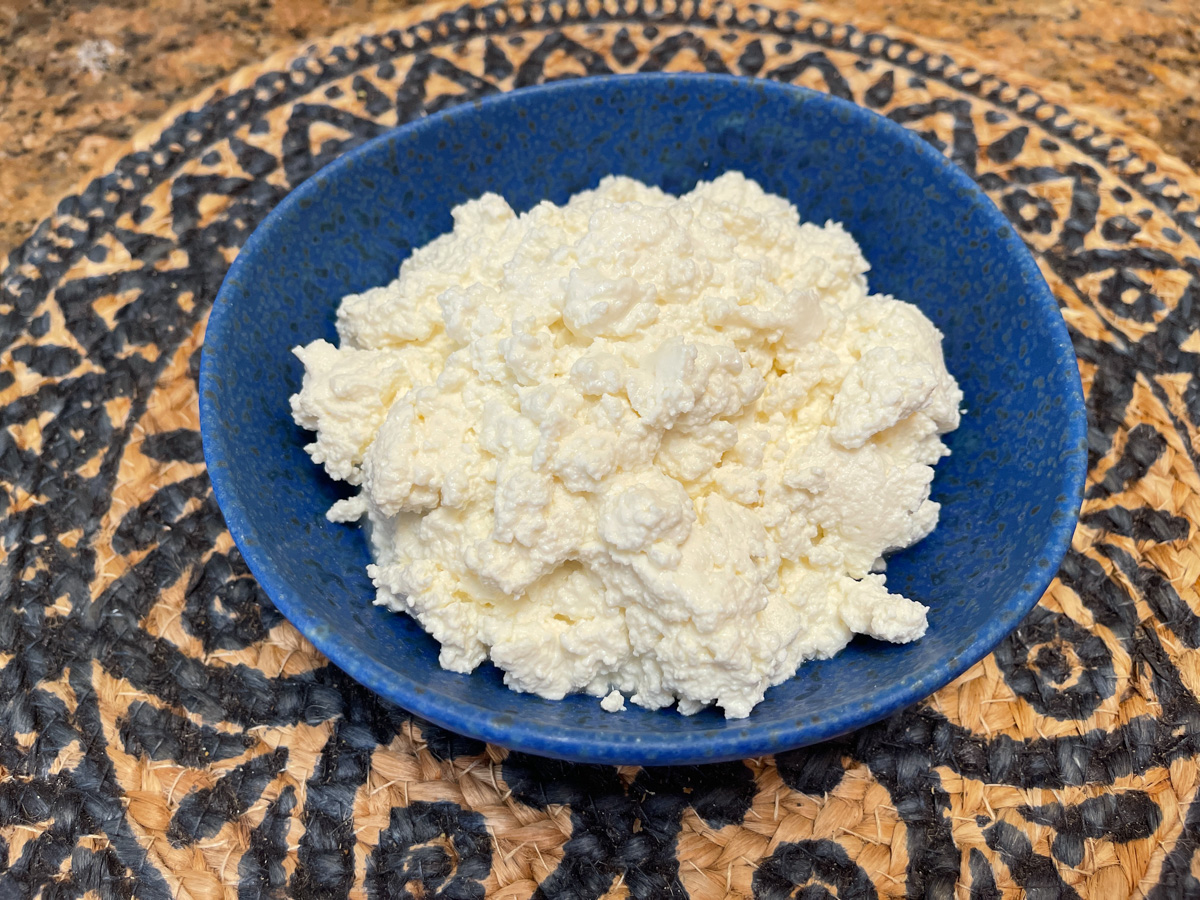
- The finished curds may have consolidated somewhat but are easy to separate. You can now add a bit of salt to suit your preference (about ¼ - ½ teaspoon should do). This is not necessary if you want a salt-free product.
- You can cover it with a little cream or milk which makes it quite delicious. Place in the refrigerator in a covered dish to store. This can last a few weeks and up to a month in the fridge.

Listen To My Podcast
Is farmer’s cheese really different than cottage cheese? In this episode, I’m sharing the story of how I first learned to make probiotic farmer’s cheese over 20 years ago from a local farmer’s wife in Kansas City — and why I’ve been making it ever since.
References I talked about:
Are you on the list?
Sign up today and I'll send you my free Getting Started Guide!
Each week I'll send you updates, tips, recipes, and more! You might even be a winner of my weekly giveaway! (starter cultures, memberships, and more!)
Come be a part of my cultured food family!