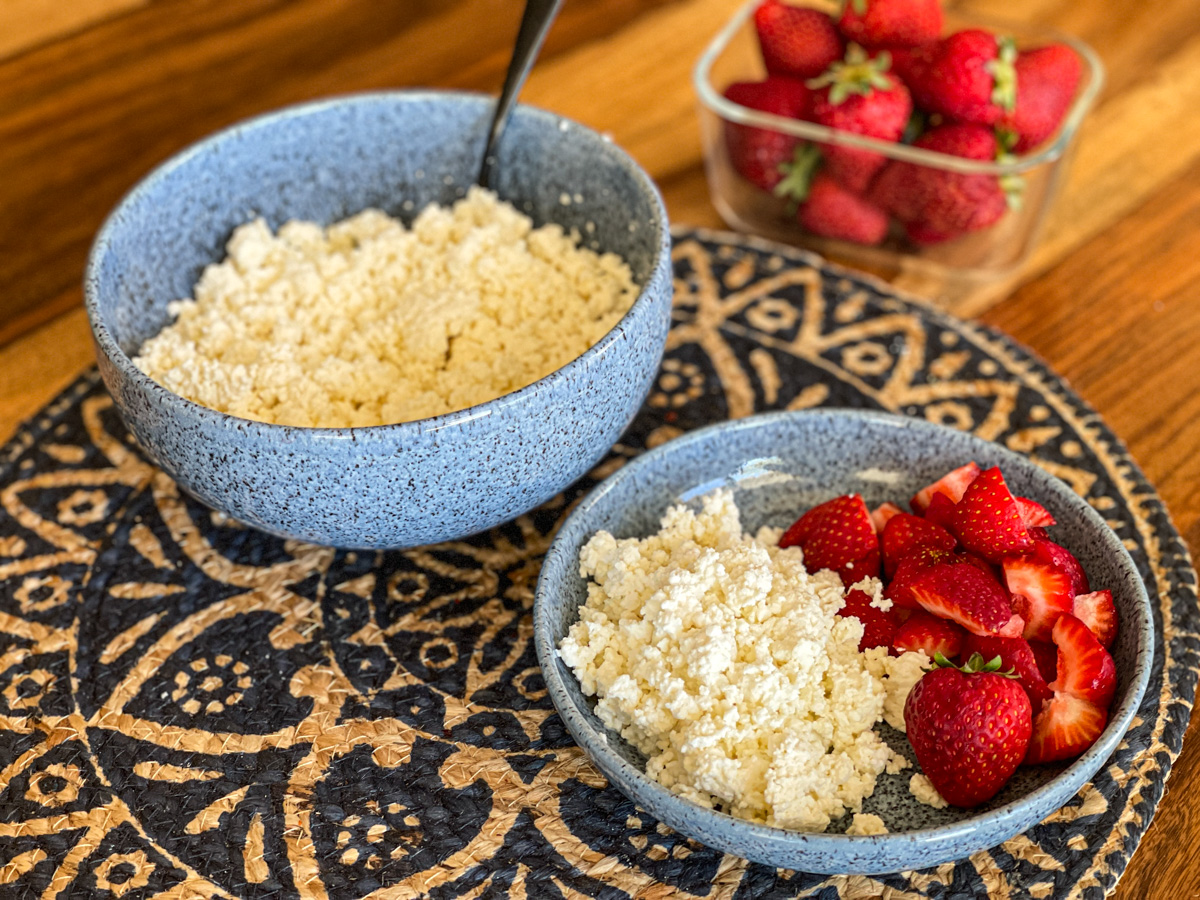
L. reuteri Cottage Cheese (Farmer’s Style)
L. reuteri yogurt is one of my favorite cultures to play with, and I love discovering new ways to use it. I honestly wasn’t sure it would work for making cottage cheese—but it does, and it’s so good. This version is really more like a traditional farmer’s cheese: slightly drier and wonderfully fresh. If you prefer it creamier, you can simply stir in a little milk at the end until it’s just how you like it.You can even use a batch of L. reuteri yogurt that has naturally separated into curds and whey—it works beautifully and nothing goes to waste.What makes this cottage cheese extra special is the sheer amount of this powerful probiotic strain you’re getting. L. reuteri is known for doing so many remarkable things in the body, including helping people sleep better than they have in years. One of its most fascinating benefits is its ability to stimulate the release of oxytocin—the “feel-good” hormone—from the brain. It’s also been linked to improvements in skin, muscle growth, bone density, insulin sensitivity, and overall body composition.I’ve received countless emails from people sharing the benefits they’re experiencing—from gut issues like SIBO and candida to better recovery and strength with exercise. The stories just keep coming.This yogurt has become a favorite in my own kitchen, and L. reuteri cottage cheese is now one of my go-to snacks or lunches. Simple, nourishing, and packed with benefits—it’s hard not to love it.
Servings: 8 cups
Ingredients
- 1 cup L. Reuteri Yogurt that has been previously made
- 1 gallon milk pasteurized (not ultra-pasteurized) whole milk or 2% or even raw milk will work too
- ¼ teaspoon salt optional
Instructions
- Place L. reuteri yogurt and a gallon of milk in a large pot and bring it to 80°F. Place a lid on it. Then turn off the heat and let sit for 24 hours or until you see a thick curd or a few billowy curds that form when you stir it.
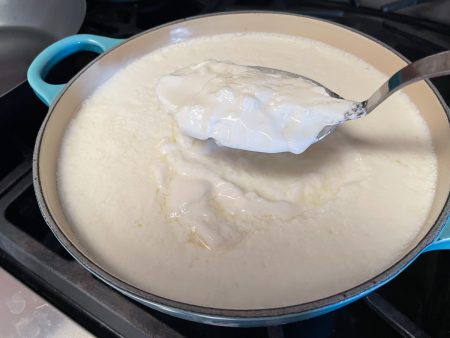
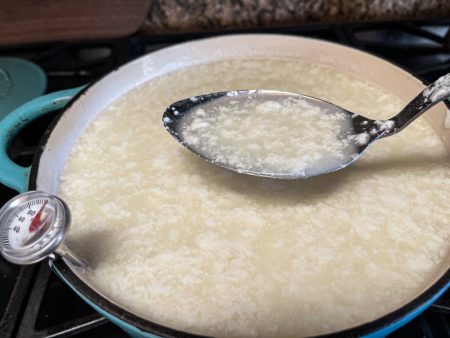
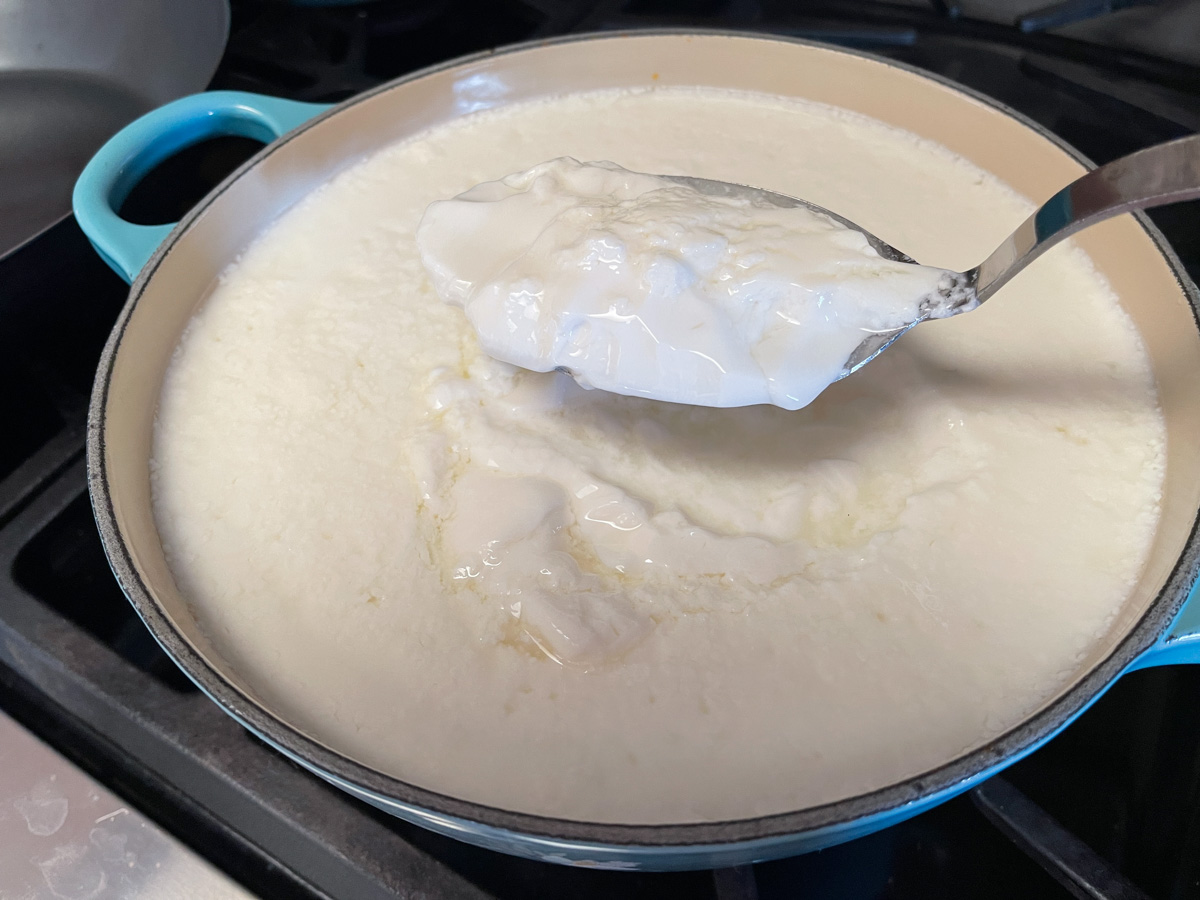
- After 24 hours or when you see a thick curd has formed, bring the pot to 100°F. Do it ever so slowly over low heat (about a degree every minute - 15-20 minutes), stirring every few minutes to break up the curds on the bottom of the pan so they won’t burn. You will know it’s done when the whey separates from the curd and you see soft fluffy curds floating. The whey is a clear yellowish liquid. If you are not seeing any whey you can take it to 102-103 F° and hold it for a minute or two until you see a little whey in the mixture and clouds of white.
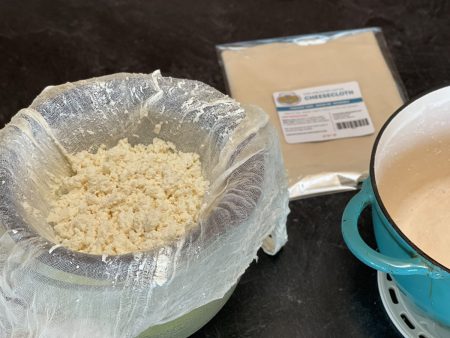
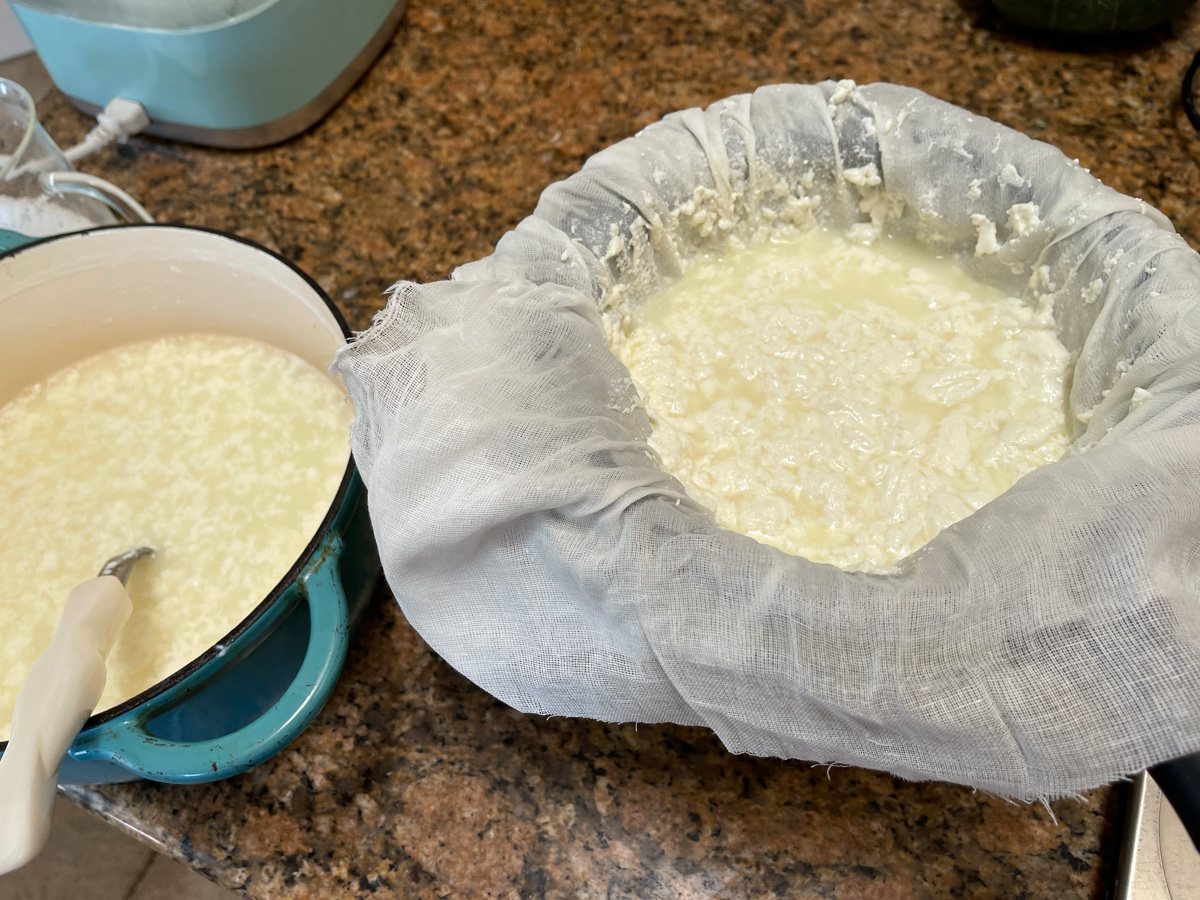
- Line a strainer with butter muslin (cheesecloth). Place the strainer over a bowl. Pour the mixture from the pot into the strainer a little at a time. I did this in two batches with the mixture, each time squeezing out the liquid (see next step) and removing the curds. Then I did it again till all the liquid was removed.

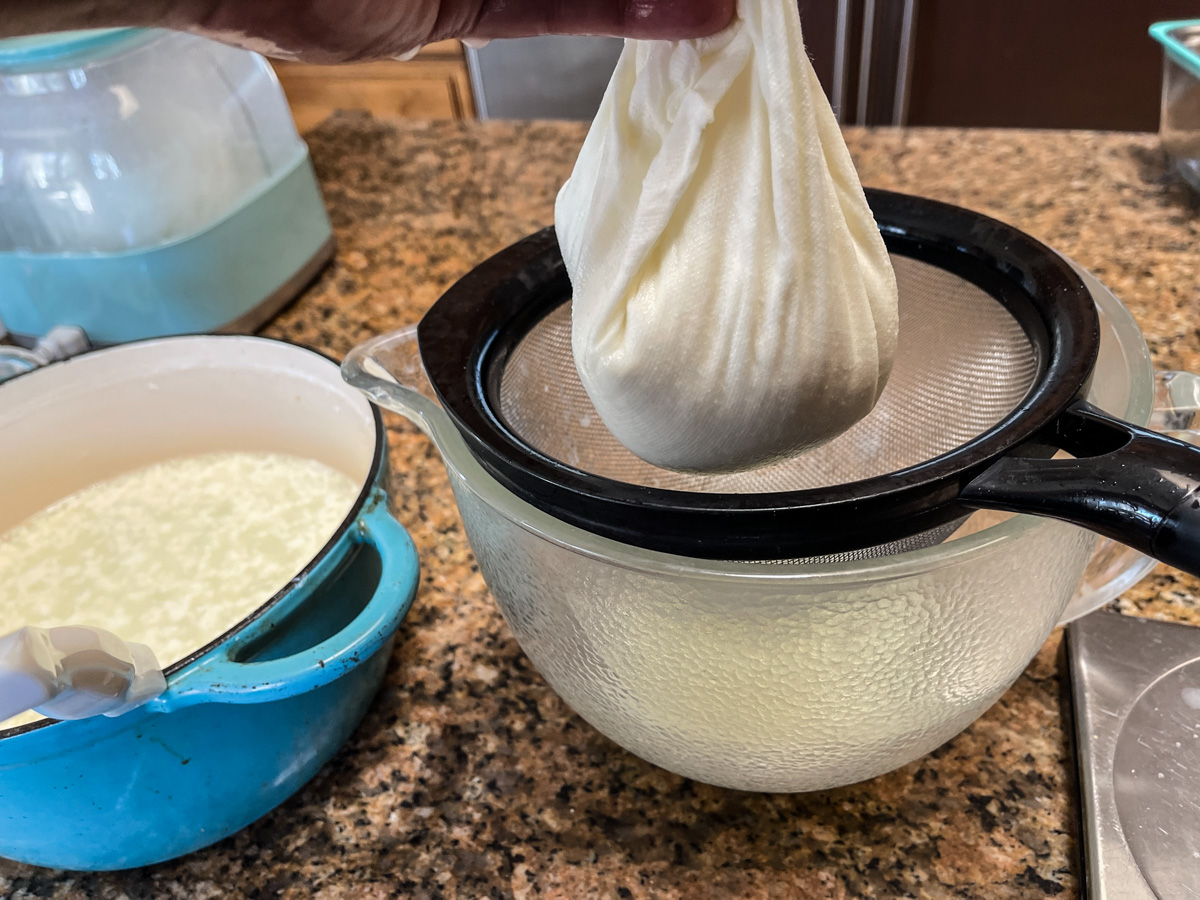
- Drain the whey by twisting the bag and the whey will drain through the cheesecloth.

- The finished curds may have consolidated somewhat but are easy to separate. You can now add a bit of salt to suit your preference (about ¼ - ½ teaspoon should do). This is not necessary if you want a salt-free product.
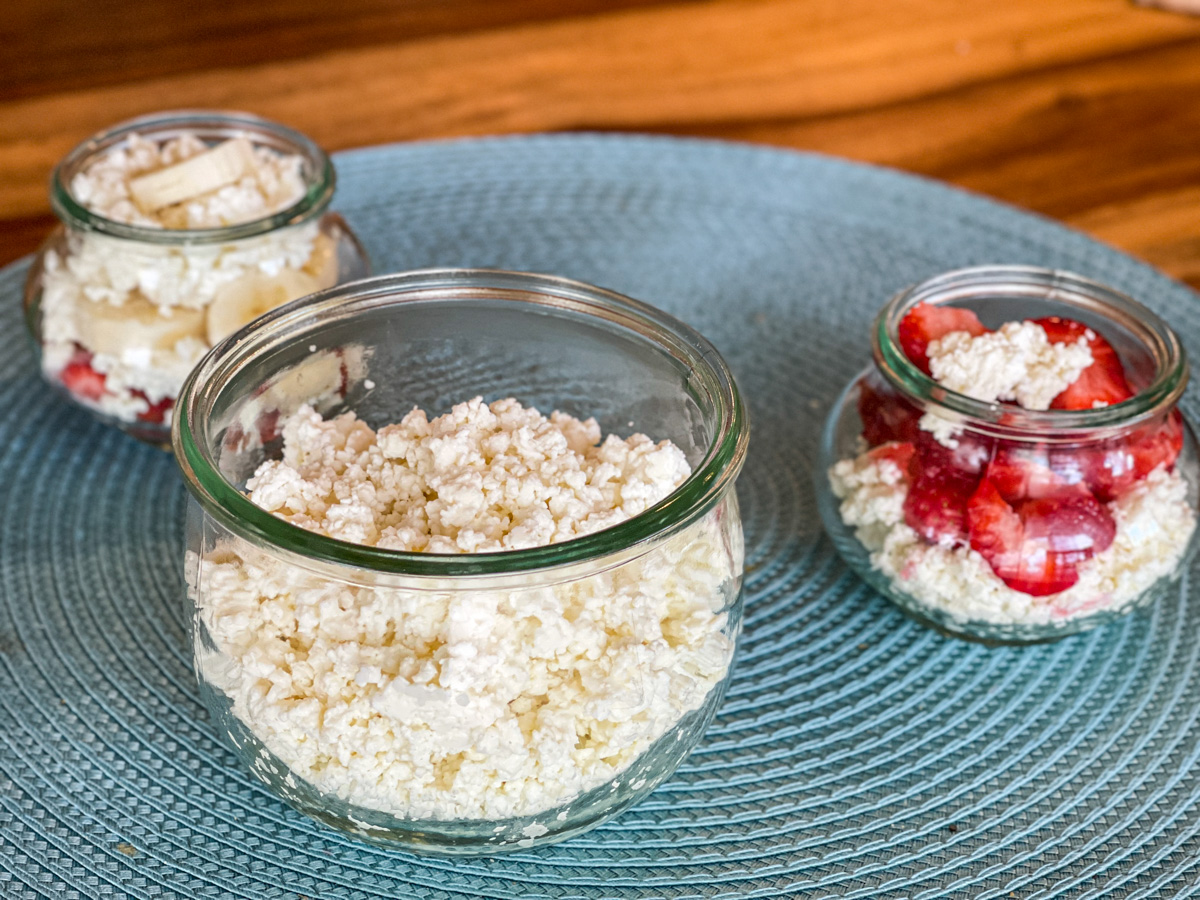
- You can cover it with a little cream or milk and fresh fruit, nuts, granola, cinnamon, or whatever you liked. Options are endless.

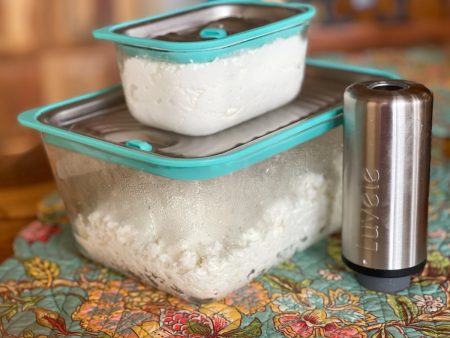
- Place in the refrigerator in a covered dish to store. This can last a few weeks and up to a month in the fridge. I love these vacuum seal containers from Luvele that make foods last 3-5 times longer and have a vacuum sealer. They're fabulous for food storage and especially for any cottage cheese.


Video
www.CulturedFoodLife.com